How to Install Pre-spaced Safety Markings
(v1.1)

Things you will need
Masking tape
Chinagraph pencil (optional)
Rigid squeegee (you can use an old credit card)
Spirit level (useful, but not essential)
An assistant to help you
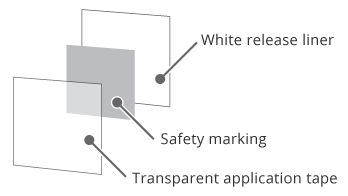
Anatomy of your markings

Your safety markings will be sandwiched between a transparent application tape on one side, and a white release liner on the other.
Do not remove these layers yet!
Step 1: Position your markings

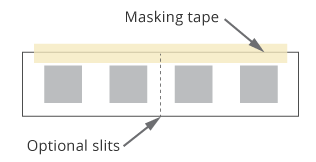
Position the markings at the correct location (see extra tips below), and temporarily hold the graphic in place with a few pieces of masking tape.
Next; use a strip of masking tape to create a hinge along the top of the markings.
Step 2: Apply your markings

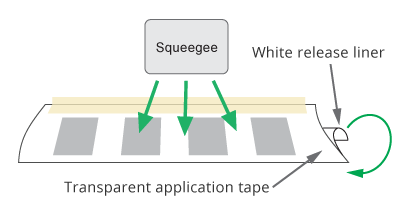
Lift up the markings and peel back the white release liner - This will expose the sticky side of the markings. Make sure you don’t allow the markings to swing back down and touch the glass, or they may stick prematurely in the wrong position. (It’s a good idea to have an assistant, hold the markings up)
Using an old credit card, press firmly down on the markings, in a top to bottom motion (so as not to trap air bubbles).
Step 3: Remove application tape

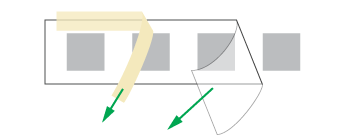
Now you can peel away the transparent application tape, to reveal the markings.
Tips to aid installation:
Use a spirit level to create a perfectly horizontal guide line on opposite side of the glass. A china graph pencil is ideal for this, or you could also use strips of masking tape.
Tape the strip of markings in the correct place, then snip between individual markings with a pair of scissors. Doing this will allow you can install individual markings more easily.


